Documentation Index
Fetch the complete documentation index at: https://docs.layercode.com/llms.txt
Use this file to discover all available pages before exploring further.
Let’s build a production-ready voice agent that can respond to users and trigger function calls.
Here’s a preview of what you will build:
- Real-time speech-to-text, text-to-speech, turn-taking, and low-latency audio delivery powered by Layercode’s edge platform.
- A sample agent backend that monitors conversation transcripts and responds based on your prompt and the tool calls you define. Deployable anywhere.
After the CLI finishes, you will see something like this: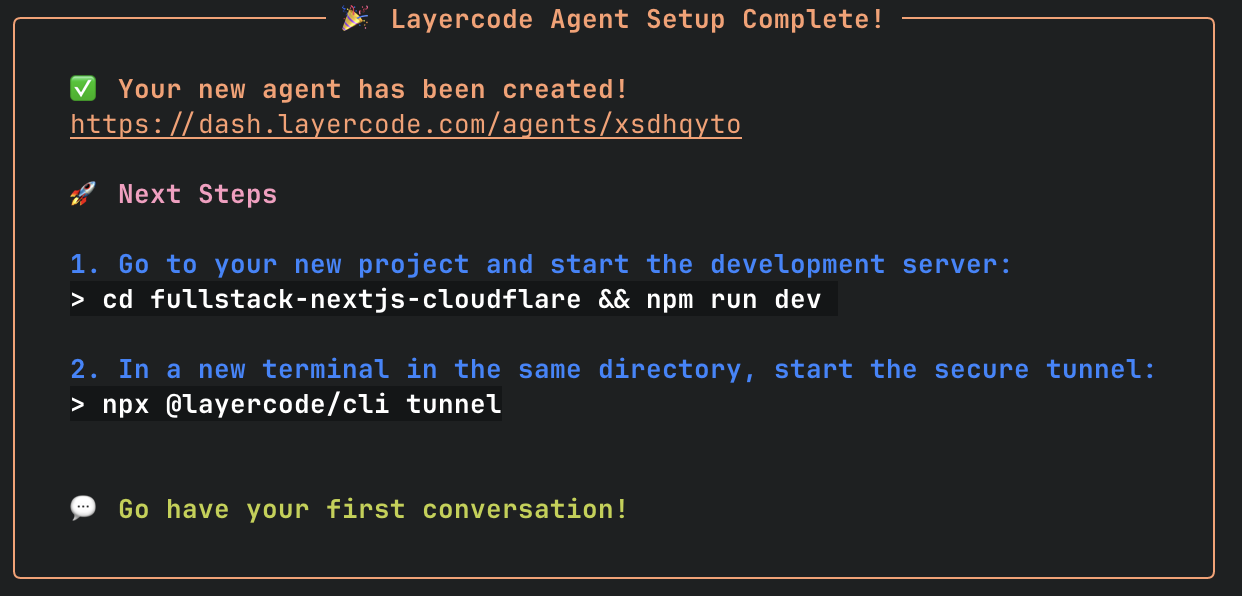
Try it out
Once everything boots, you can start a conversation locally (typically at http://localhost:3000/).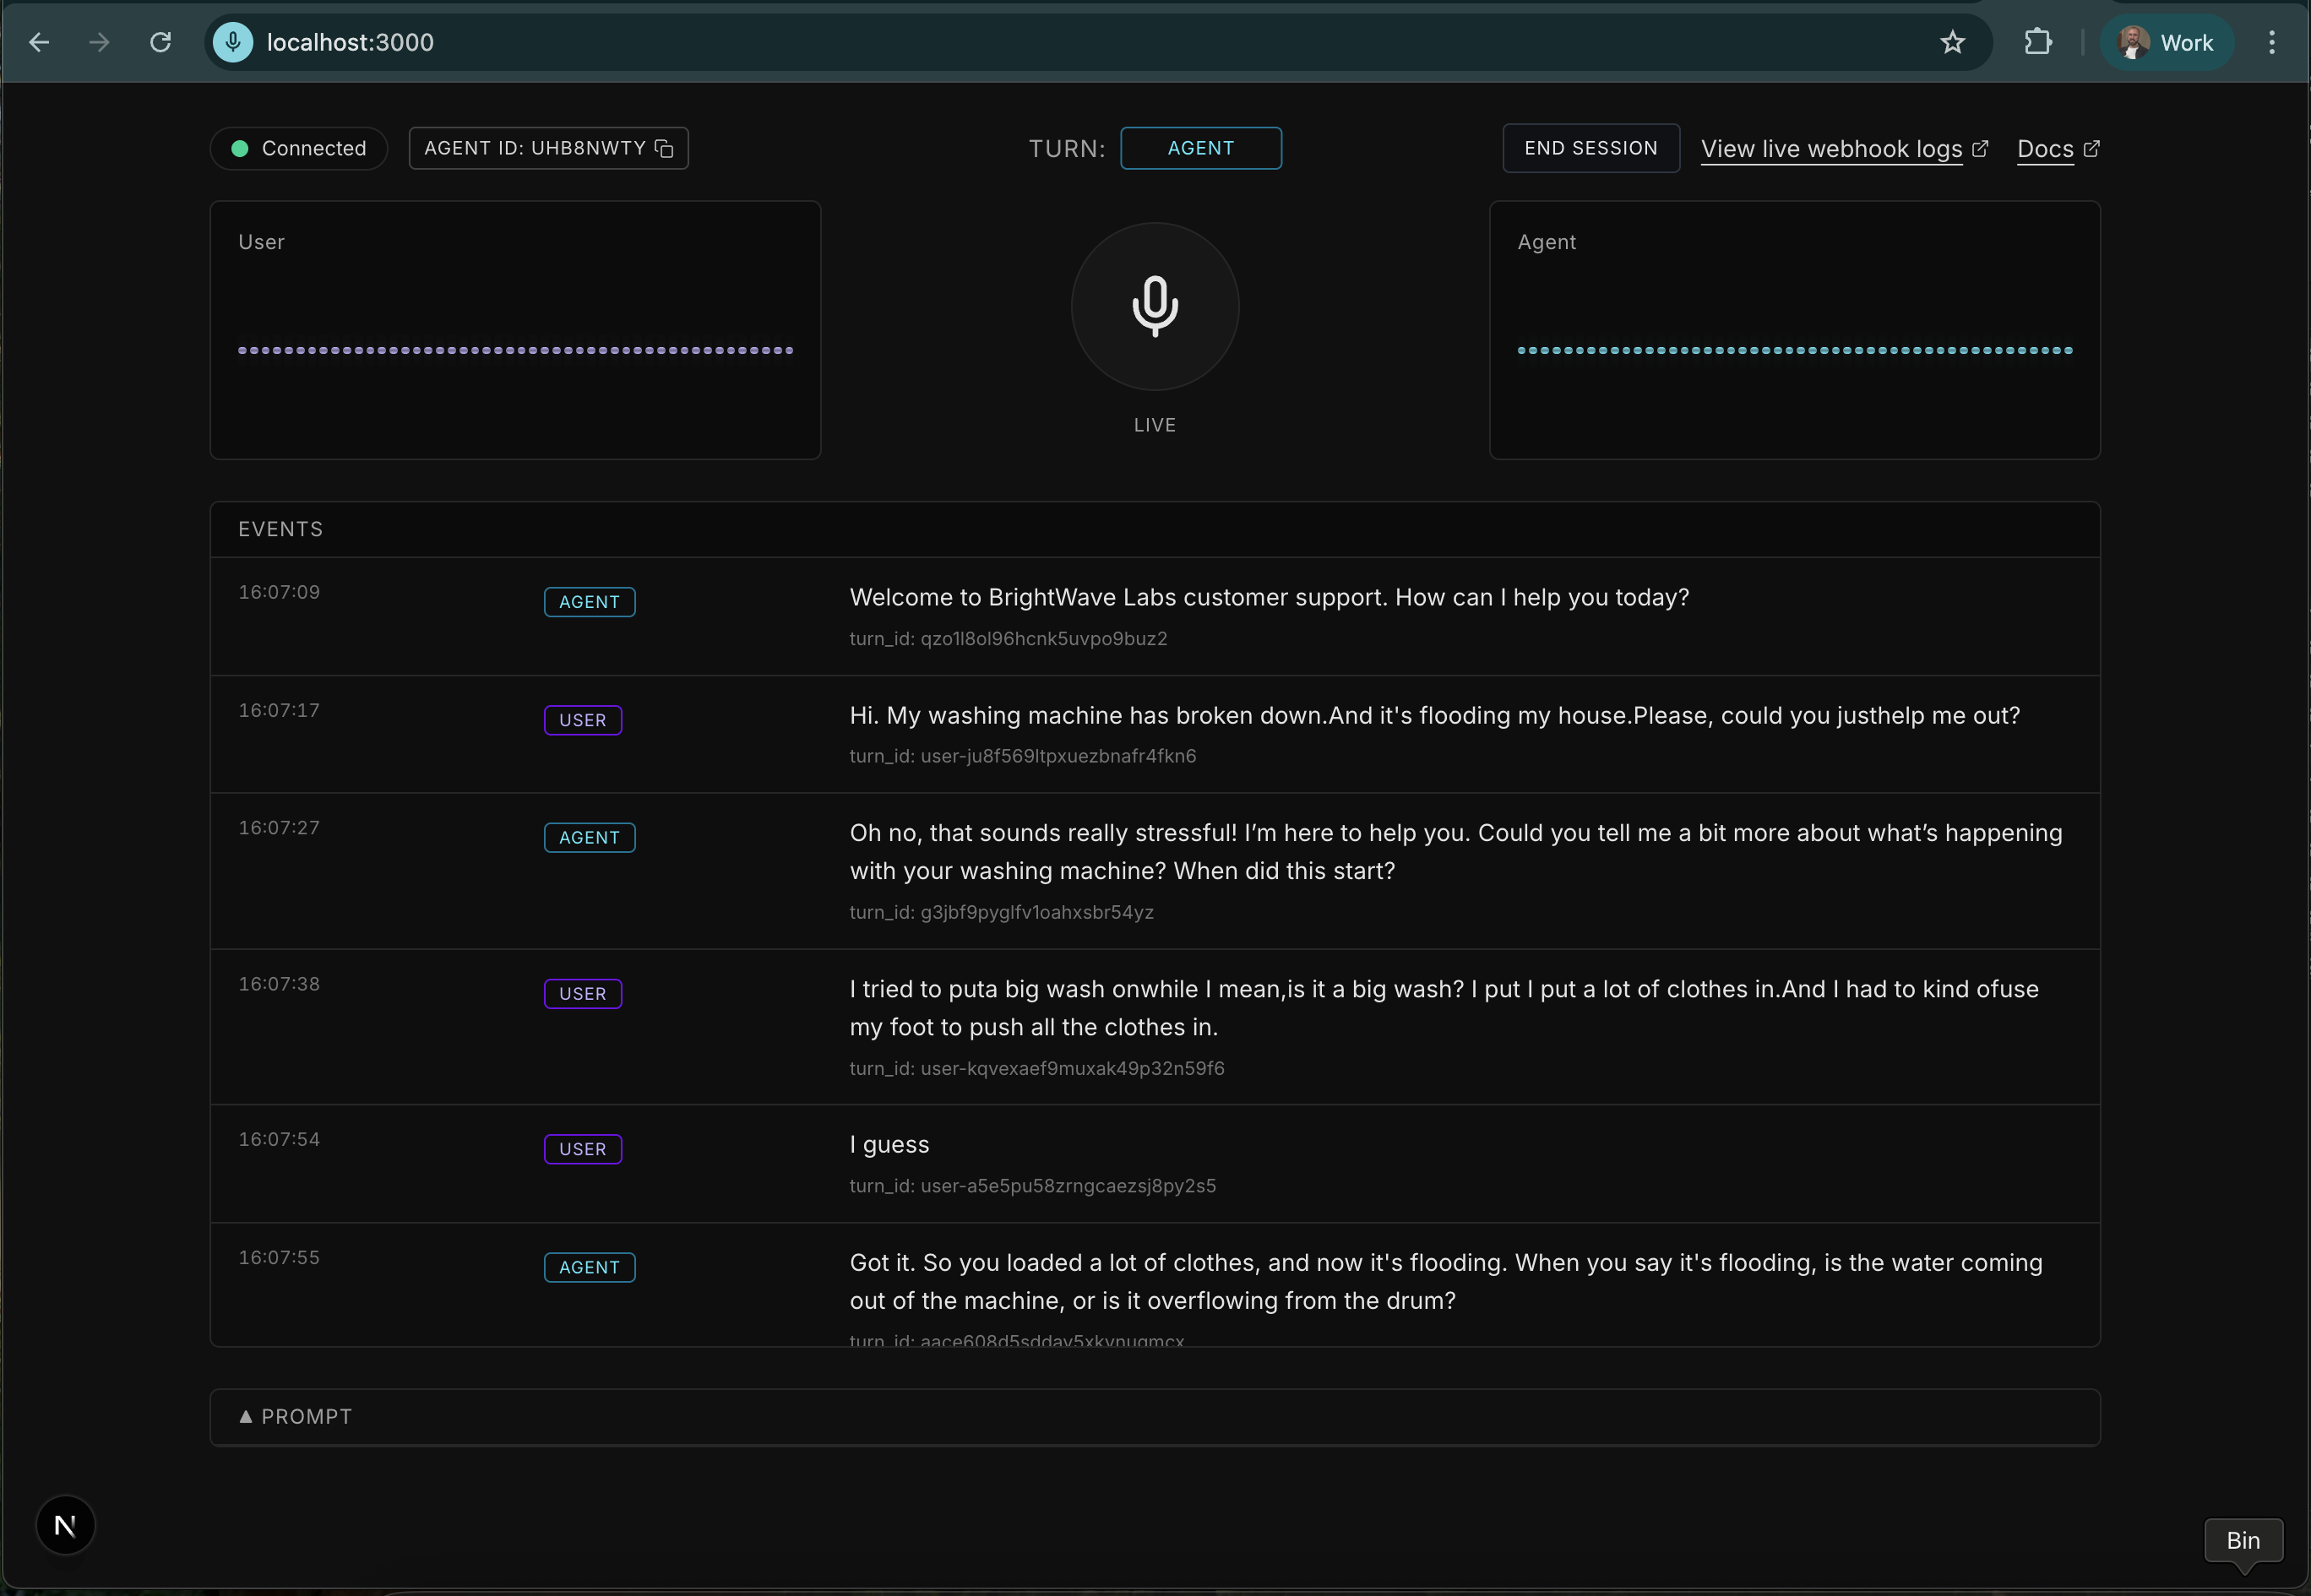
Video walkthrough
Prefer a walkthrough? Watch the quick demo below. Learn how to create your first voice agent for real-time conversational AI. This guide walks through logging in, creating an agent, and testing it in the playground.Sign up, log in, and grab your keys
- Visit dash.layercode.com and log in or sign up if you haven’t already.
- Create a new agent or use the agent that Layercode auto-creates for you.
- Copy the agent ID for later.
- Click Connect your backend, copy the Webhook secret, and save it for later.
- In Account settings, copy your Layercode API key and save it for later.
Choose your stack
You will need a Google Gemini API key.
Clone our example repo
git clone https://github.com/layercodedev/fullstack-nextjs-cloudflare.git
cd fullstack-nextjs-cloudflare
Install dependencies
Create an .env file (you can copy .env.example).Populate the variables with the values you grabbed from Layercode in the first step.NEXTJS_ENV=development
NEXT_PUBLIC_LAYERCODE_AGENT_ID=
LAYERCODE_API_KEY=
LAYERCODE_WEBHOOK_SECRET=
GOOGLE_GENERATIVE_AI_API_KEY=
npm run dev.Set up a tunnel
To let Layercode reach your app, expose it to the internet during development.We recommend Cloudflared, Cloudflare’s tunneling utility. Follow our Cloudflare Tunnel guide to install it.Once it is installed, run:cloudflared tunnel --url http://localhost:*PORT_NUMBER*
Get your Cloudflared tunnel URL
The logs include a URL similar to https://phone-tom-applying-individually.trycloudflare.com.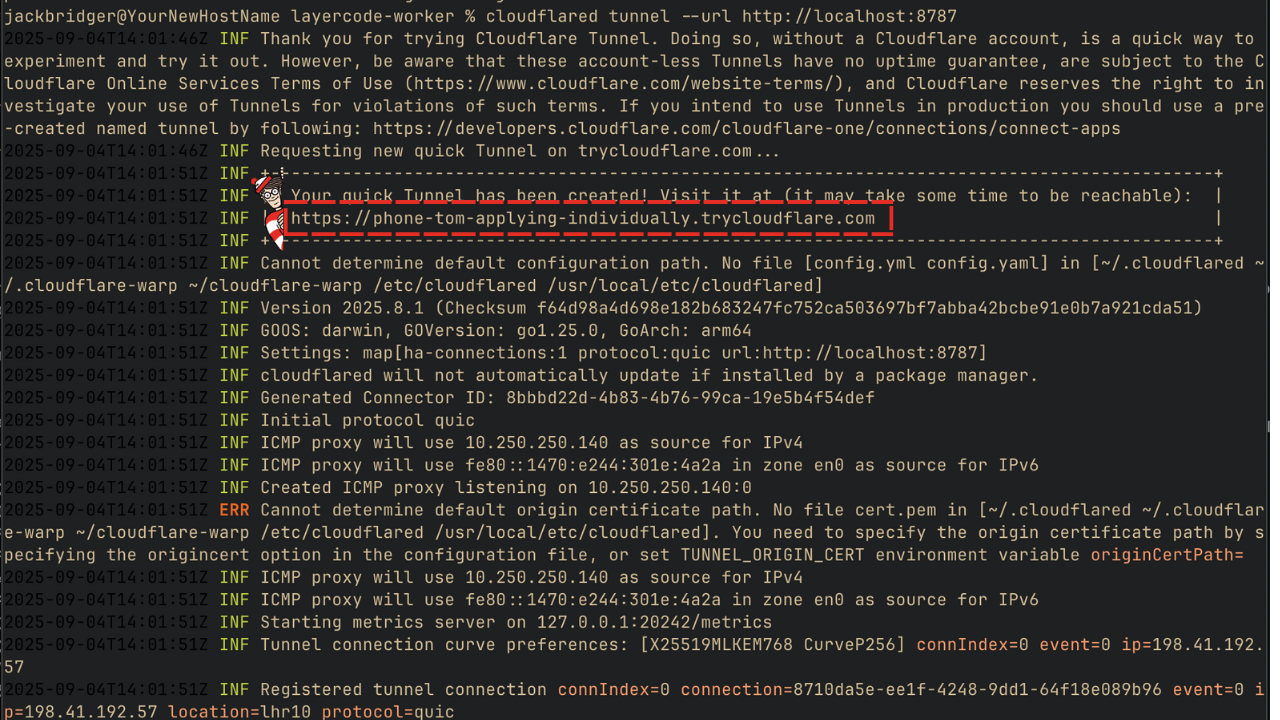
Save your URL in the dashboard
Append /api/agent to the URL (for example, https://phone-tom-applying-individually.trycloudflare.com/api/agent).Head to the Layercode dashboard at https://dash.layercode.com/.Open the agent you are working with, click Connect your backend, and paste the URL into Webhook URL. Save your changes.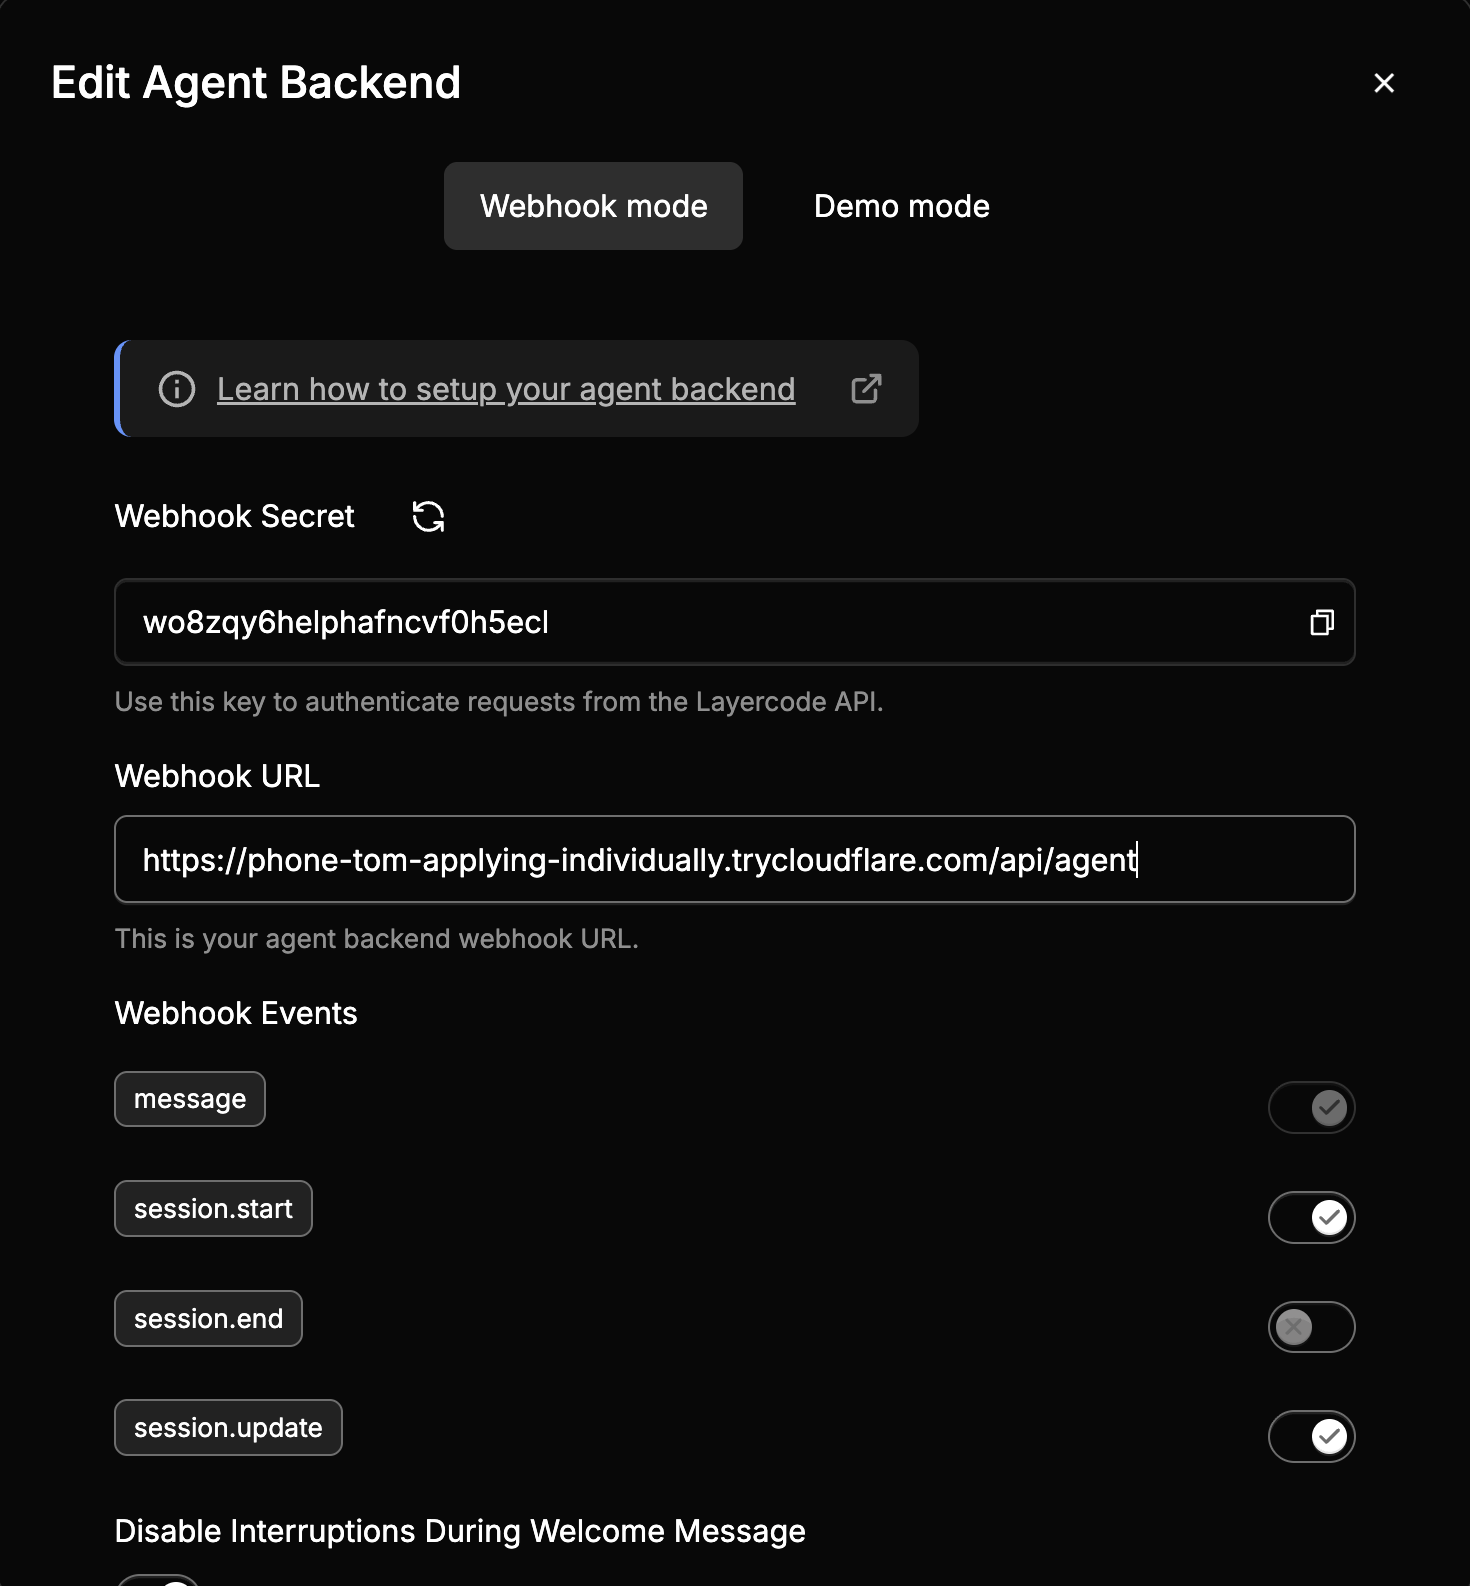 (yes I did roll the secret)Refresh your app and test it. It should work—and if you get stuck, email us and we’ll help.
It lives
Your agent should now be working—go check it out! We have guides for stacks that aren’t Next.js and do not yet have quick starts (we’re working on them).Backend guides
Frontend guides
Next steps
Keep iterating—here are the next things builders usually tackle.
Customize your prompts
Adjust the prompt or welcome_message in layercode.config.json.
{
  "layercode_agent_id": "ibcjp4z0",
  "prompt": "You are having a spoken conversation with the user.",
  "welcome_message": "Hey, how can I help you today?"
}
/app/api/agent/route.ts. Modify it or add your own.
const weather = tool({
  description: 'Get the weather in a location',
  inputSchema: z.object({
    location: z.string().describe('The location to get the weather for')
  }),
  execute: async ({ location }) => {
    stream.data({ isThinking: true });
    // do something to get the weather
    stream.data({ isThinking: false });

    return {
      location,
      temperature: 72 + Math.floor(Math.random() * 21) - 10
    };
  }
});
Store your messages
Set up persistent storage for transcripts. A fast database or data store such as Cloudflare D1 or Redis works well. A dedicated guide is coming soon.
Deploy your voice agent backend
Layercode runs the voice pipeline in our cloud, but your backend APIs (and frontend, if you are not using Next.js or telephony) need to be deployed.
Use the deployment guides:
Remember to set your environment variables in the hosting platform and update the Layercode dashboard with the deployed webhook URL.
Set up telephony
Follow the Twilio setup guide to add phone-call support.
Use the Layercode tunnel
We provide a tunnel utility for local development.
# Start a tunnel for agent dtv3x3d2 on port 5173 with the API located at /api/voice-agent
npx @layercode/cli tunnel --agent-id=dtv3x3d2 --port=5173 --path=/api/voice-agent --tail