Use this file to discover all available pages before exploring further.
Layercode makes it easy to build web-based voice agent applications in React. This guide walks you through a full-stack React example voice agent, letting users speak to a voice AI in their browser.Example code:layercodedev/example-frontend-react
This frontend example is designed for use with a backend. Check out our tutorials in Node.js and Python or for demo purposes, use the Layercode demo platform.
To get started, you’ll need a Layercode account and a voice agent. If you haven’t done so yet, follow our Getting Started Guide.Clone the example repo and install dependencies:
Disable React Strict Mode for Development: React Strict Mode renders components twice in development, which causes the Layercode voice agent hook to initialize twice. This results in duplicate voice agent sessions and can cause issues like hearing the voice agent speak twice.If you’re using Create React App, remove <React.StrictMode> from your src/index.js or src/index.tsx:
src/index.tsx
import React from 'react';import ReactDOM from 'react-dom/client';import './index.css';import App from './App';const root = ReactDOM.createRoot( document.getElementById('root') as HTMLElement);root.render( // Remove React.StrictMode wrapper for Layercode development <App />);
If you’re using Vite, ensure React.StrictMode is not wrapping your app in src/main.tsx.
We use the React SDKuseLayercodeAgent hook, which handles all the complexity required for real-time, low-latency, two-way voice agent interactions.Here’s a simplified example of how to use the React SDK in a React application:
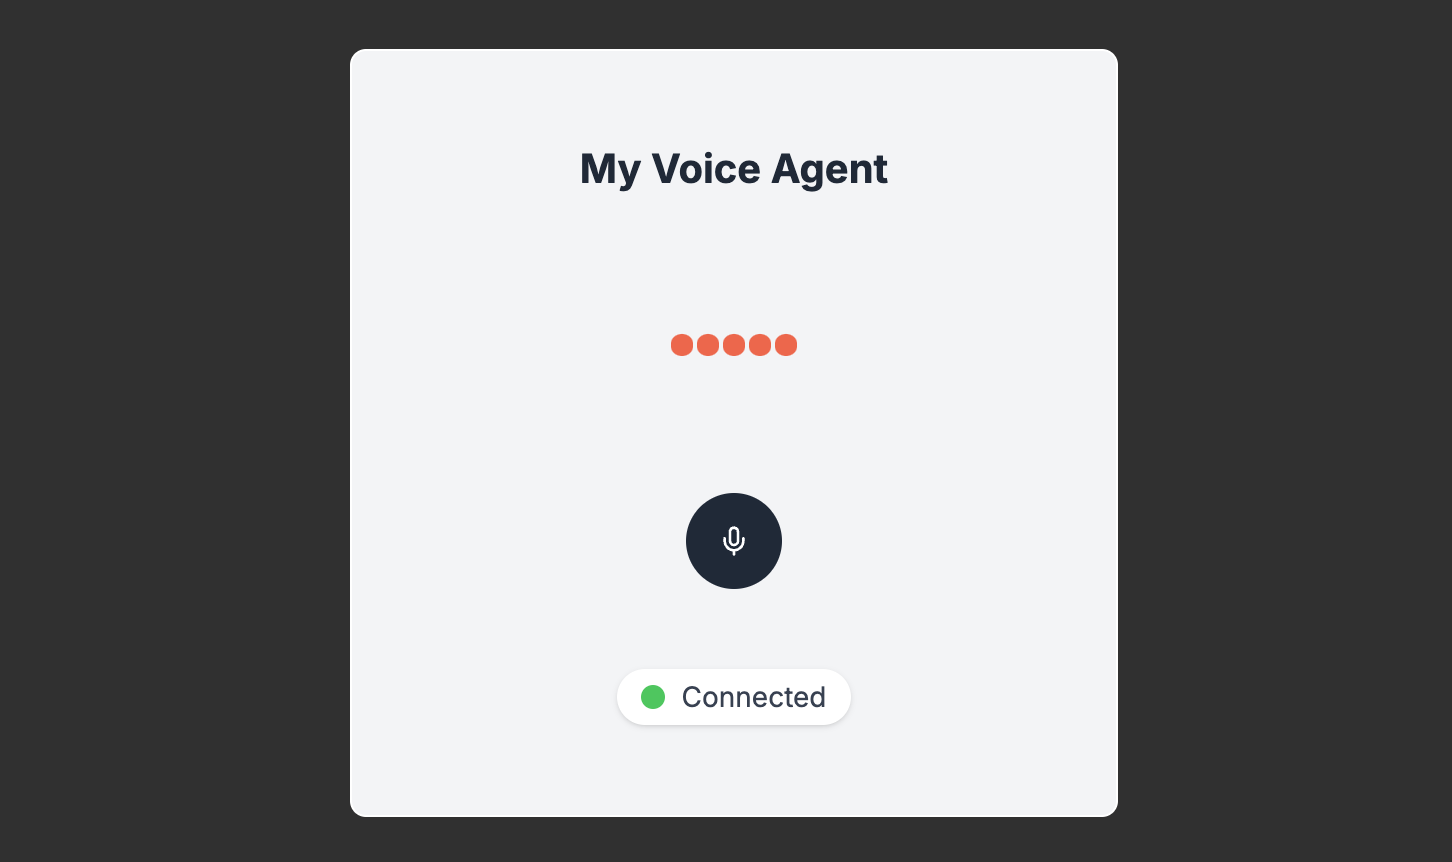
The AudioVisualization component is used to visualize the audio from the voice agent. It uses the agentAudioAmplitude value returned from the useLayercodeAgent hook to drive the height of the audio bars with a simple animation.
src/ui/AudioVisualization.tsx
export function AudioVisualization({ amplitude, height = 46 }: { amplitude: number; height?: number }) { // Calculate the height of each bar based on amplitude const maxHeight = height; const minHeight = Math.floor(height / 6); const barWidth = Math.floor(minHeight); // Create multipliers for each bar to make middle bars taller const multipliers = [0.2, 0.5, 1.0, 0.5, 0.2]; // Boost amplitude by 7 and ensure it's between 0 and 1 const normalizedAmplitude = Math.min(Math.max(amplitude * 7, 0), 1); return ( <div className="w-auto flex items-center gap-[2px]" style={{ height: `${height}px` }}> {multipliers.map((multiplier, index) => { const barHeight = minHeight + normalizedAmplitude * maxHeight * multiplier; return ( <div key={index} className="flex flex-col items-center" style={{ height: `${barHeight}px`, width: `${barWidth}px`, }} > {/* Top rounded cap */} <div className="bg-[#FF5B41] dark:bg-[#FF7B61] transition-all duration-20" style={{ width: "100%", height: `${barWidth}px`, borderTopLeftRadius: "9999px", borderTopRightRadius: "9999px", }} /> {/* Middle straight section */} <div className="bg-[#FF5B41] dark:bg-[#FF7B61] transition-all duration-20" style={{ width: "100%", height: `calc(100% - ${2 * barWidth}px)`, borderRadius: 0, }} /> {/* Bottom rounded cap */} <div className="bg-[#FF5B41] dark:bg-[#FF7B61] transition-all duration-20" style={{ width: "100%", height: `${barWidth}px`, borderBottomLeftRadius: "9999px", borderBottomRightRadius: "9999px", }} /> </div> ); })} </div> );}
The ConnectionStatusIndicator component is used to display the connection status of the voice agent. It uses the status value returned from the useLayercodeAgent hook to display the connection status.
Because the useLayercodeAgent hook handles all of the audio streaming and playback, in most cases the microphone button is simply a visual aid and doesn’t implement any logic. A simple microphone icon inside a circle will suffice in most cases.Layercode does support ‘push-to-talk’ turn taking, as an alternative to automatic turn taking (read more about turn taking). When using ‘push-to-talk’ turn taking, holding down and releasing the MicrophoneButton must send a websocket message to tell Layercode the user has started and finished talking. In this example, we provide an alternative VoiceAgentPushToTalk component, that along with the MicrophoneButtonPushToTalk component, handles this logic.To use this mode, you’ll need to edit src/App.tsx to use the VoiceAgentPushToTalk component instead of the VoiceAgent component. Then in your Layercode Dashboard, you’ll need to click Edit in the Transcription section of your voice agent and set the Turn Taking to Push to Talk.